How to Remove Furniture Stains Like a Norwich Pro


A tipped glass on a light sofa can make a room go silent fast. One second everything looks fine. The next, there's a dark spot spreading across fabric that may have taken weeks to choose and years to pay off.
That moment feels worse when the piece isn't disposable furniture. It's the dining chair fabric chosen to match the table finish, the custom sofa built for a particular room, or the wood surface that anchors everyday family life. Knowing how to remove furniture stains matters because good furniture isn't just décor. It's part of the home's daily story, and protecting it is part of protecting the investment.
From Our Norwich Family to Yours A Guide to Protecting Your Furniture

Our neighbors in Norwich don't usually panic because of the spill itself. They panic because they're afraid of making it worse. That fear is justified. A fast reaction helps, but the wrong fast reaction can push liquid deeper, rough up the surface, or leave a visible ring that's harder to fix than the original mess.
That's why stain care should be treated the same way quality furniture is chosen. Carefully, deliberately, and with respect for the material in front of you. Investment-grade quality deserves a calm first response, not a frantic scrub with whatever happens to be under the sink.
Furniture owners in Eastern CT often live with a mix of materials in the same home. Upholstered seating in the living room, wood dining surfaces, recliners, benches, and custom fabrics all behave differently. A method that helps one stain can damage another surface. The safest approach starts with understanding the material first, then acting in the right order.
Neighborly advice: The best stain-removal habit isn't owning every cleaner on the shelf. It's knowing when to stop, test, and slow down.
That perspective comes from long local experience. Gorins' family-owned furniture store reflects a business founded in 1936 and operating for nearly 90 years as a locally owned, family-operated business in Norwich, CT, a heritage also noted in this Norwich business profile.
Three habits protect furniture better than guesswork:
- Respond quickly: Fresh spills are easier to control than set-in ones.
- Match the method to the material: Fabric, wood, and specialty finishes need different care.
- Protect the finish, not just the look: A stain that disappears but leaves fiber damage or surface dulling isn't a real win.
The Golden Rule of Stain Removal Blot Dont Rub
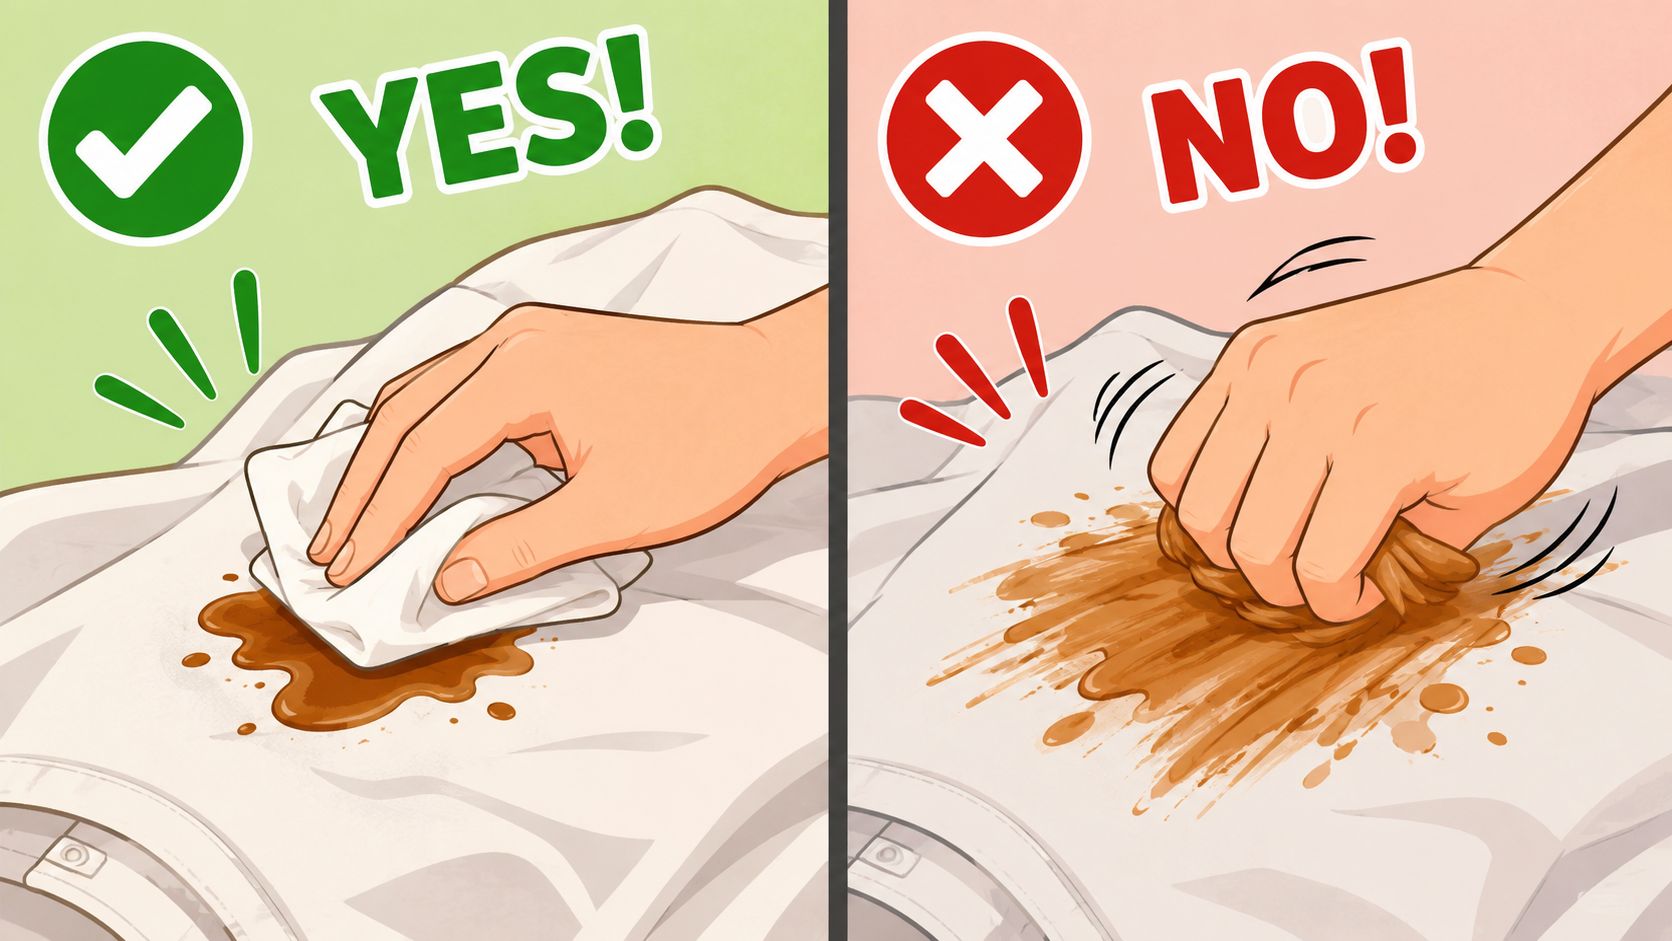
A spill lands on a dining chair or custom upholstered seat, and the first few seconds usually decide whether you are dealing with a quick cleanup or a permanent reminder. On investment-grade furniture, that first response matters even more because aggressive cleaning can leave wear, fuzzing, or a dull patch that stands out long after the stain is gone.
The rule is simple. Blot, don't rub.
Rubbing drives liquid deeper into the fabric, spreads the affected area, and roughs up the fibers on the surface. I have seen homeowners remove the spot but leave behind visible texture damage, which is a poor trade on a well-made piece. With higher-end upholstery, including custom-order fabrics, preserving the fabric face is part of the job.
What to do right away
Use a clean, dry, white cloth and work with a light hand. White cloth matters because colored towels can transfer dye, especially onto lighter fabrics.
Then follow this order:
- Lift off any solids first: Scoop away food or residue carefully so it does not smear into the weave.
- Blot from the outside inward: That keeps the stain from growing past its original edge.
- Press, lift, and switch cloth areas: Let the cloth absorb the spill instead of grinding it into the upholstery.
Keep the fabric damp at most, never wet. Excess moisture creates its own problem, especially on cushioned seats where liquid can sink below the surface and resurface later as a ring or odor.
That is one reason upholstery materials and how they behave matters so much. A tight synthetic blend often releases a spill more easily than a textured weave, performance fabric, or custom upholstery with an unknown cleaning code.
Where good intentions cause damage
The usual mistakes are pressure, friction, and grabbing the first cleaner under the sink. For quality furniture, those shortcuts can do more harm than the spill itself. A harsh cleaner may strip color, flatten the nap, or leave a water mark around the original spot.
If a mild product is appropriate for the fabric, use it on the cloth, not poured directly onto the furniture. For households trying to avoid stronger chemicals, a natural stain treatment for fabrics can be a reasonable option after spot-testing in a hidden area.
Unknown fabric codes need extra caution.
That comes up often with custom pieces, older purchases, and special-order seating where the paperwork is long gone. In those cases, the safest win is a controlled first response, blotting, limiting moisture, and stopping before a small stain turns into fiber damage on furniture you planned to keep for years.
Tackling Common Spills on Upholstery
Most household stains fall into a few broad categories. Oil-based messes need absorbency. Drink spills need controlled moisture. Marking stains like ink need a gentle hand and realistic expectations. The method changes, but the goal stays the same. Lift the contaminant without damaging the upholstery.
Precise timing matters with absorbents. Baking soda should dry completely, which typically takes 15 to 30 minutes, and cornstarch for grease should sit for 15 to 20 minutes before vacuuming, according to this stain-removal timing guide for furniture.
DIY Stain Removal Cheat Sheet for Upholstery
| Stain Type | DIY Solution | Method |
|---|---|---|
| Grease or oil | Cornstarch or baking soda | Cover the spot lightly, leave it in place for 15 to 20 minutes, then vacuum carefully. After that, reassess before adding any liquid. |
| Wine or coffee | Clean white cloth, then a very light soap solution if the fabric safely allows it | Blot first. If residue remains, use a small amount of cleaning solution on a cloth, not poured onto the furniture, and work with minimal moisture. |
| Ink | Dry blotting first, then cautious spot testing | Don't spread it with water immediately. Test any cleaner in a hidden area before touching the visible spot. Small marks respond better than saturated ones. |
Grease needs a dry first step
Oil moves differently than water-based spills. If liquid cleaner goes on too early, it can drive grease deeper into the fiber structure instead of pulling it out. Dry absorbents buy time and reduce that risk.
That's why grease stains should be handled in phases:
- Apply an absorbent first: Cornstarch or baking soda sits on top and draws oil upward.
- Vacuum gently: Use low-agitation removal so the powder doesn't grind into the fabric.
- Recheck before repeating: If the stain lightens but doesn't disappear, another dry application may help more than a stronger wet treatment.
This approach is useful on everyday seating and on fine upholstery alike, from an Ashley Furniture sectional to a Best Home Furnishings recliner.
Drink spills need control, not saturation
Coffee and wine create two problems. They leave color behind, and they tempt people to over-wet the area while trying to flush that color out. Oversaturating upholstery often creates a larger cleaning zone than the original stain.
For many fabric-safe situations, a mild soap solution used sparingly on a cloth can help. Some homeowners also prefer a natural stain treatment for fabrics when they want a simpler option for spot cleaning, but any treatment still needs the same discipline: test first, use very little, and avoid scrubbing.
Ink is where patience pays off
Ink doesn't behave like a spilled drink. It concentrates color fast, and careless wiping can turn a small dot into a larger shadow. Start dry. Blot gently. Then test in a concealed area before trying anything stronger.
Helpful upholstery choices can make future cleanups less stressful. This overview of the best upholstery fabrics for active homes is useful for anyone planning ahead before the next accident happens.
What If You Dont Know the Fabric Code

Custom furniture creates a different kind of stain problem. The piece may be beautiful, suited to the room, and exactly what the homeowner wanted. Then a spill happens, and nobody can find the cleaning code.
That situation is common. 68% of custom upholstery buyers can't locate or understand their fabric cleaning code at the time of staining, and improper DIY attempts damage 23% of custom pieces. That matters for homes with highly personalized upholstery choices, especially where made-to-order programs offer extensive fabric variation.
What the codes mean in practical terms
The common codes are familiar, but they're often missing, confusing, or buried in paperwork:
- W: Water-safe methods are typically allowed.
- S: Solvent-only care is usually the safer lane.
- WS: Water or solvent methods may be acceptable.
- X: Vacuuming and professional care are often the safer route.
When the code is unknown, the smartest move is to treat the fabric as unverified until it proves otherwise.
Field rule: Unknown fabric should be approached like delicate fabric until testing says otherwise.
A safer diagnostic protocol
Start in a hidden area. Under a cushion, behind a skirt, or on the back side of the piece is usually best. The goal isn't to clean the hidden area perfectly. The goal is to learn how the fabric reacts.
Use this sequence:
- Test with a dry white cloth first: Press and lift to check for surface transfer.
- Try a tiny amount of water on a cloth: Not directly on the fabric. Let the spot dry fully and watch for texture change, color shift, or ring formation.
- If water looks risky, stop: Don't scale up.
- If the fabric appears stable, continue cautiously: Keep moisture low and work slowly.
- If needed, reserve stronger options for professional guidance: Especially on custom upholstery, a small mistake can become a visible panel mismatch.
This is especially relevant with custom seating programs and investment-grade living room pieces where fabric selections are highly individualized. Anyone shopping performance-oriented options can also review summer-proof furniture and performance fabric guidance before the next spill ever happens.
Erasing Water Rings and Stains from Wood
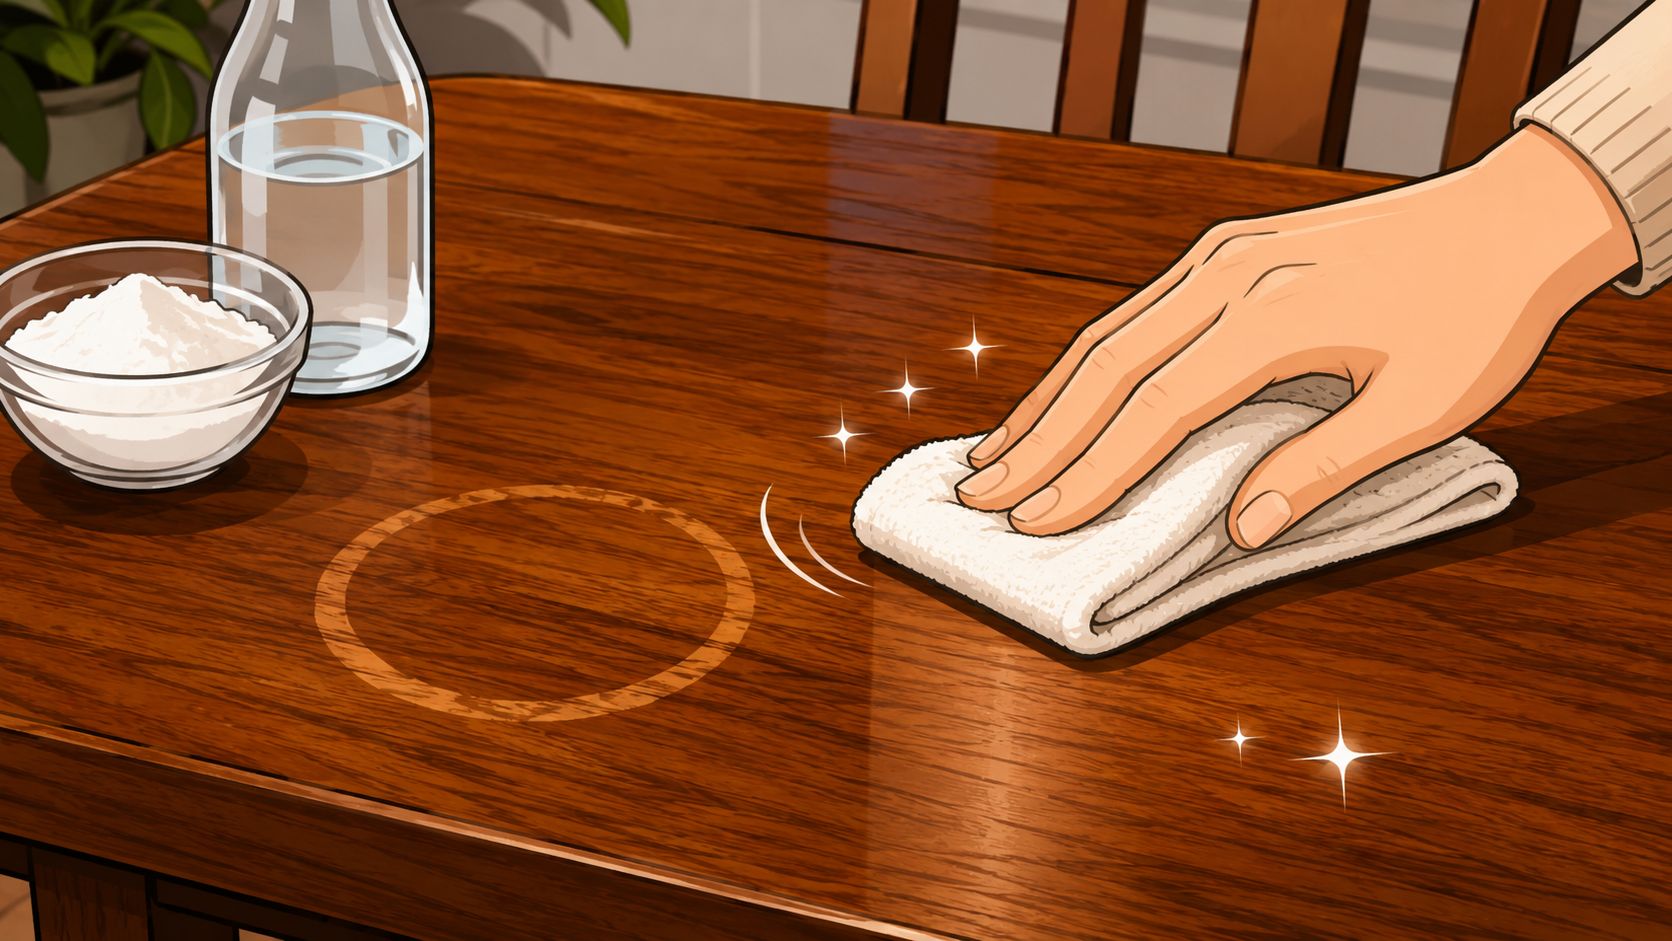
Wood stains need a different mindset. Fabric care is about lifting contamination from fibers. Wood care is often about drawing trapped moisture back out without disturbing the finish more than necessary.
For white water marks, one successful method is to apply undiluted white vinegar so it forms a small puddle just beyond the stain, let it soak for 30 to 60 minutes, and then use light heat from a hair dryer to help lift the moisture and restore color, as described in this guide to removing water stains from wood furniture. The process can fail if the wood becomes over-saturated, so restraint matters.
The safest way to do it
- Use a controlled amount: The surface should be treated, not flooded.
- Watch the edges: Extend slightly past the visible ring so the whole mark is addressed evenly.
- Apply gentle heat after the soak: Medium heat and movement are safer than intense direct heat in one spot.
That advice is especially useful for dining pieces, occasional tables, and custom wood furniture where finish consistency matters. For broader prevention and upkeep, this guide on how to care for wood furniture gives homeowners a stronger long-term routine.
Some water events go beyond a simple ring. If a piece has broader moisture exposure, swelling, odor, or deeper structural concerns, this resource on restoring water-damaged furniture quickly can help frame what recovery may involve.
When to Trust a Professional With Your Investment
A smart homeowner knows the difference between a manageable stain and a risky experiment. That line usually appears when the stain is set in, the fabric is unknown, the finish is delicate, or a home remedy has already changed the look or feel of the material.
Professional help isn't giving up. It's asset protection. That's especially true with custom dining chairs, custom-made sofas, recliners, heirloom wood pieces, and upholstery that has already been over-wet, over-scrubbed, or partially discolored by trial-and-error cleaning.
Signs it's time to stop DIY
- The stain has changed texture: Sticky residue, stiffness, or roughened nap often means the issue is no longer just cosmetic.
- The area is getting larger: Expanding rings usually signal too much moisture or product.
- The color is shifting: If the fabric or finish looks lighter, darker, or uneven, more cleaning can make that permanent.
- The piece is custom or investment-grade: One visible panel mismatch can affect the whole look of the furniture.
Why professional care can be the better value
Targeted cleaning often protects appearance, finish, and lifespan better than repeated home attempts. For readers weighing that trade-off, this article on the advantages of professional carpet cleaning offers useful context that also applies to upholstery care.
When replacement does become the right decision, financing can soften the jump from problem to solution. Equal monthly payment options can make a major furniture purchase feel more manageable, especially when the goal is affordable luxury rather than a rushed compromise. And for custom buyers, pieces with thousands of combinations in dining and living room programs deserve the same thoughtful approach during ownership that they received at selection.
Since 1936, Gorins Furniture & Mattress has helped Norwich and Eastern CT families create homes they love. From custom-designed Canadel Custom Dining with thousands of combinations to personalized living room options like the F9 Custom Sofa series, the showroom is built around quality, value, and helpful service. Shoppers can visit the Norwich showroom, take the online Style Quiz, or browse the Clearance section for value-driven savings. From custom furniture care to Tempur-Pedic, Serta, and Beautyrest guidance in the Sleep Gallery, plus Promotional Financing with equal monthly payments, everything is suited to your lifestyle.