Lift Chair Installation: A Complete Step-by-Step Setup Guide


The box looks straightforward enough when it lands at the door, but that's usually the moment people realize a lift chair isn't just furniture. It's a powered system, a mobility aid for some households, and a piece of living-room seating that has to fit the room, the outlet, the floor, and the user all at once. The best installations start long before the first bolt is tightened, because the biggest mistakes happen in planning, not in lifting the chair.
Lift chair installation sits in the middle of a meaningful specialty seating market. The global lift chair market was estimated at USD 516.2 million in 2022 source, which helps explain why delivery teams treat setup as a serious workflow instead of a quick drop-off. In practice, the job blends pre-planning, assembly, electrical awareness, and a final safety check. A chair that's assembled fast but positioned poorly will still feel wrong, bind under load, or expose the user to avoidable risk.
What Lift Chair Installation Really Involves
A lift chair usually arrives looking like a simple delivery, but the real work starts before the box is opened. Proper lift chair installation begins with the room, the path into the home, the outlet placement, and the amount of space the chair needs once it starts moving.
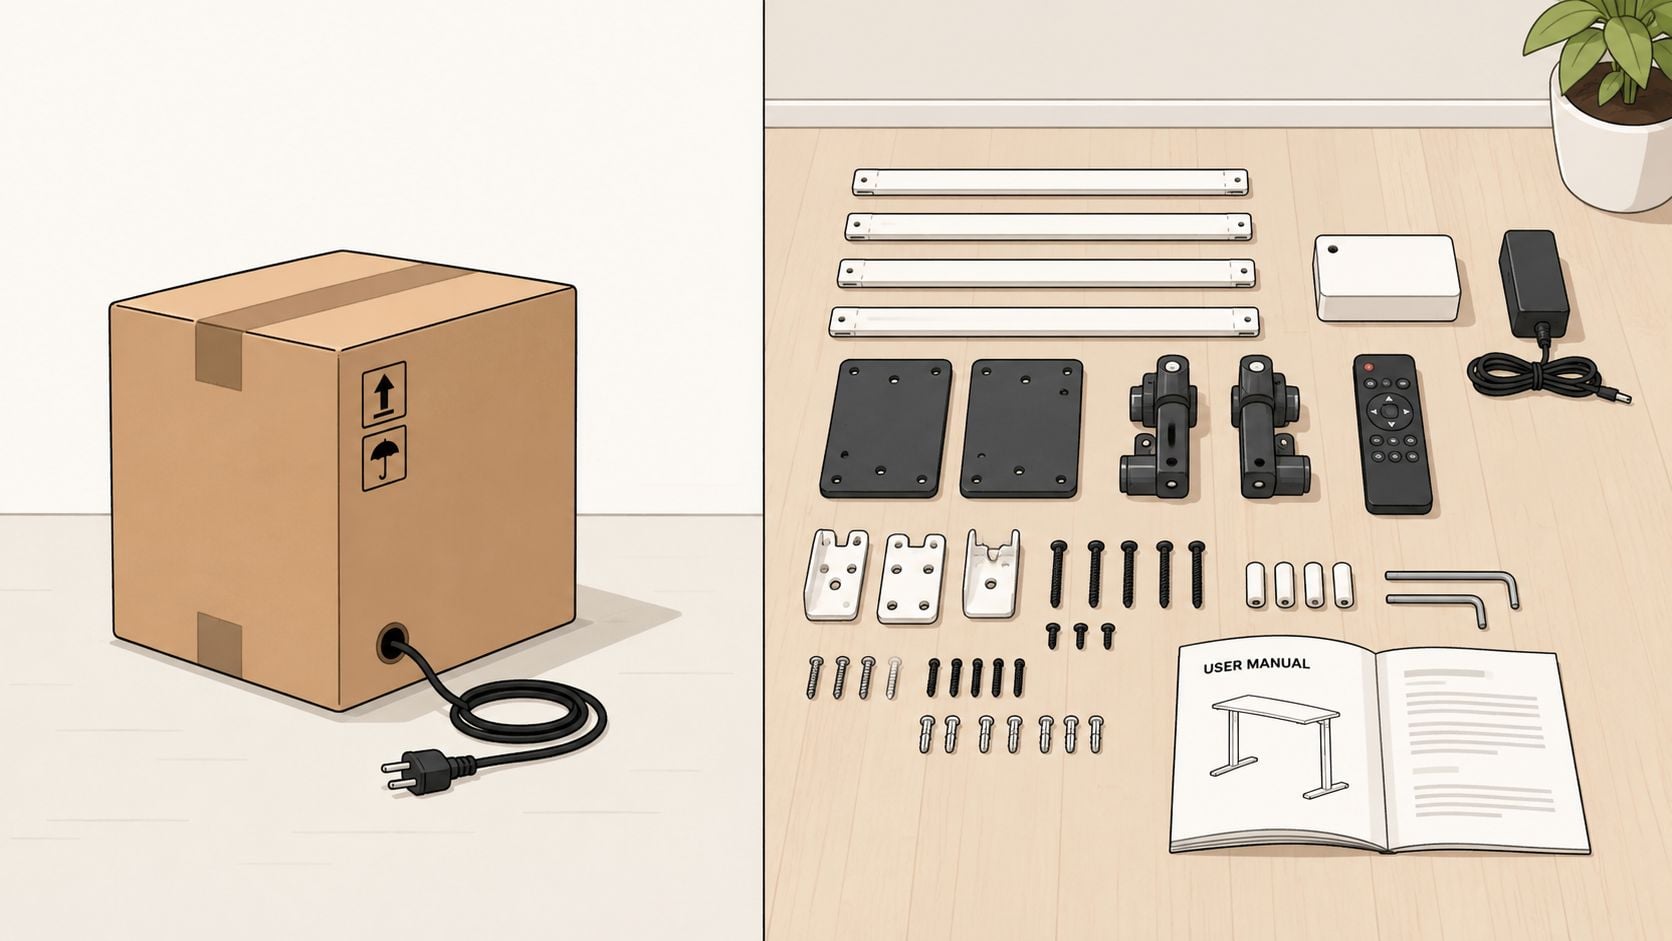
The category has enough depth that major furniture and mobility manufacturers compete in it source. That matters on installation day because mature products usually come with clearer instructions, more consistent controls, and fewer surprises if the setup follows the manual instead of guesswork.
A good delivery crew treats the job as a sequence of checks. The chair needs to come in without torn upholstery or stressed wiring. The frame has to go together without forcing connectors or misaligning parts. The room needs enough clearance for the base, the backrest, and the footrest to move without striking a wall, rug edge, or side table. Only after that should the lift cycle, recline cycle, and stop behavior be tested.
Practical rule: if the chair feels “basically done” before the function test, the installation usually isn't done yet.
There is also a real difference between a standard power-lift recliner and a chair chosen for mobility support. One may be picked mainly for comfort and easier standing assistance, while the other may need closer attention to caregiver use, clearance, and setup details. That difference changes how carefully the installer handles user instruction and follow-up adjustment. A clear overview of how lift chairs work helps make sense of the mechanism before delivery day, and any broader plan for modifying your home for independence should account for the chair as part of the room, not as a stand-alone purchase.
Pre-Installation Planning and Room Measurements
The most common installation failure begins with a room that looked roomy from the front door and suddenly feels cramped once the chair is inside. The fix is simple in theory and critical in practice, measure the route, the landing spot, and the operating envelope before the chair ships. A lift chair needs more than a footprint, it needs room to move, room to recline, and room for the user to stand safely.
Start with the exact location. The chair should sit near a power outlet, away from loose cords, and far enough from walls that the backrest and footrest can travel fully without rubbing. Measure the doorway width, hall turns, stair landings if the chair has to be carried upstairs, and the path from entry to final position. For households thinking about independence-focused home changes, this resource on modifying your home for independence is useful context because the chair should fit into a wider accessibility plan, not just a single room.
Space guidance matters too. Published stair-lift guidance says the minimum stair width is usually 30 inches for straight staircases and 34 inches for curved ones source. Even when a lift chair isn't going on stairs, that kind of measurement discipline is the right mindset. Width, turning radius, and landing clearance are the checks that prevent delivery-day improvisation.
| Measurement | Why It Matters | Typical Target |
|---|---|---|
| Doorway width | Confirms the chair can reach the room without damage | Wide enough for safe clearance |
| Path to room | Prevents scraping walls, trim, or furniture | Clear, straight, and obstacle-free |
| Outlet location | Keeps the cord short and safe | Nearby and reachable without stretch |
| Rear clearance | Allows recline and lift travel | Enough room for full movement |
| Side clearance | Makes transfers easier | Enough for safe access from both sides |
For a deeper room-by-room planning pass, the guide on how to measure furniture is worth following before anyone moves the box. The point is not to make the room perfect, it's to make the chair usable without rearranging the house every time someone stands up.
A sensible planning checklist looks like this:
- Measure the final spot first. The chair should fit its open position, not just its closed shape.
- Check the outlet before delivery. Power should reach the chair without crossing a walkway.
- Clear the travel path. Lamps, baskets, and table corners are what get damaged on move-in day.
- Confirm turning space. Tight hallways and door corners are where setup teams lose time.
- Document local code needs early. Homes with accessibility goals may need permit or inspection awareness, especially when broader accessibility work is being done.
A residential wheelchair-lift planning guide says safe planning should include a mobility and dimension review, local code and permitting checks, and attention to drainage slope where relevant source. Even though a lift chair is different from a structural lift, the same habit applies, measure first, move second, install third.
Unpacking and Physical Assembly
Once the chair is in the room, the job turns into careful handling instead of heavy lifting. The safest approach is to open the packaging fully, inventory the parts, and keep the upholstery protected while the frame pieces are separated. Rushing here usually leads to scuffed arms, crossed cables, or a connector that gets forced into the wrong socket.
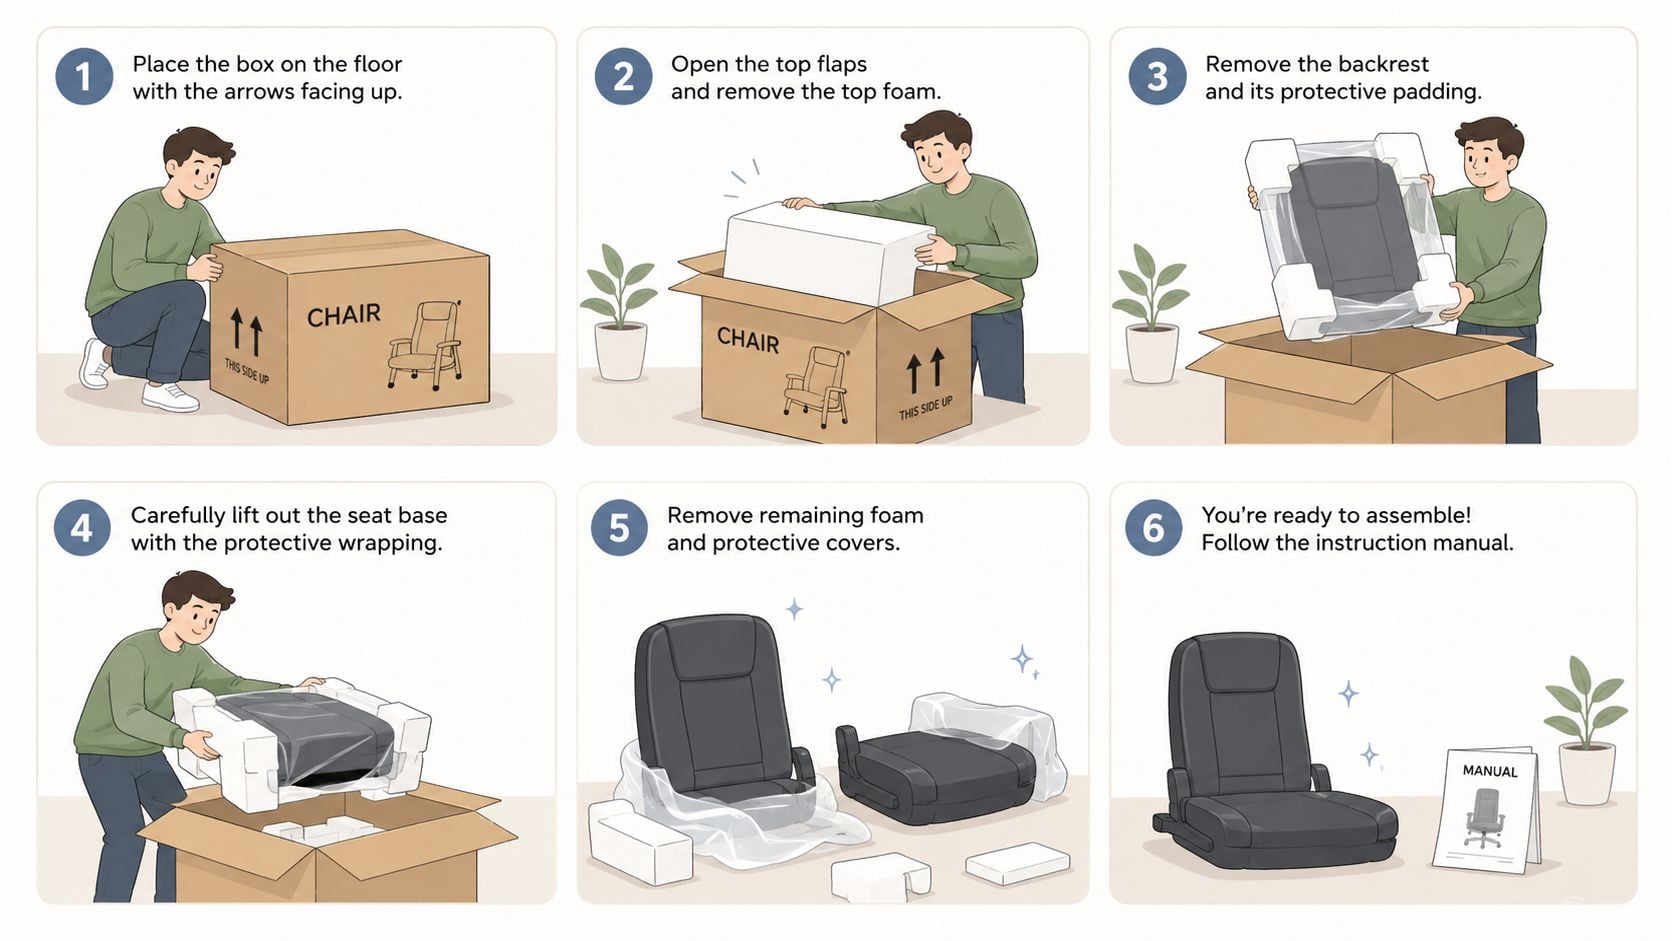
The assembly sequence is usually straightforward, but it rewards patience. The backrest needs to mate cleanly to the seat base, the lift columns or support structure need to seat firmly, and any hidden harnesses need to be routed before the final fastening. A ceiling-fan installation guide is a useful comparison point because both jobs look simple until connector order and support alignment become the difference between stable and sloppy, especially if the installer wants a reference for careful overhead-style assembly work like installing a ceiling fan.
A good showroom crew watches for three things during assembly. First, the connectors should only mate one way, so they don't get forced backward. Second, the frame should sit square before the last fasteners are tightened. Third, the chair should feel solid on the floor without a wobble when the base is fully seated.
The chair should feel planted before power ever reaches it. If it rocks, shift the frame, not the user.
That's where the details matter. Assembly guidance has shown that connector orientation and clamping discipline are not decorative steps, they protect the harness and keep features from failing later. Another installation manual specifies a tightening stage at 20 Nm for chair and display loom connections source, which is a reminder that loose hardware can be just as troublesome as overtightening. For chairs with a lift-column interface, the base should press fully into place before any final tightening, because a half-seated base creates wobble that shows up immediately in daily use.
Some shoppers also like to compare powered seating types before deciding on the final model. This overview of power reclining seating helps frame the difference between features, but the assembly lesson stays the same, respect the connector layout, keep the frame square, and don't rush the last fastener.
Electrical Hookup and Battery Backup
A lift chair can be assembled correctly and still fail on the day it is plugged in if the electrical setup was rushed. I treat the hookup as part of the pre-planning work, because the outlet location, cord route, and backup power plan all affect how the chair will live in the room. If the chair sits tight to a wall or beside a side table, the cord path needs to be sorted before the chair is moved into its final spot.
Power-lift recliners usually have more than one connection point, especially if the chair includes lumbar support, headrests, charging ports, heat, or massage. The plugs may look alike, but they are not always interchangeable, and each one still has to be seated in the right direction. A chair can seem dead when one harness is missed, and a reversed connector can send you looking for a bigger problem than you really have. For a clear example of how easily a hidden plug gets overlooked during setup, source shows the kind of post-install mistake that happens when someone assumes the job is done once the chair is upright.
Battery backup is part of the safety plan. A powered chair should still be able to return someone to a usable position if the power goes out, so the backup system needs to be checked before the installer leaves. That test does not take long, but it tells the homeowner whether the chair can still move in an outage instead of leaving them stuck in a reclined position.
Practical rule: if the cord crosses a walking path, the route is wrong, even if the chair works.
Keep the power lead along a wall, leave enough slack for the chair to move, and never let the cord get pinched behind the frame or under a moving section. If an extension is the only option, it should be handled with care and kept short, with the run kept clear of the mechanism. The safe extension tips from Bulls Eye Repair are a useful reminder that extra length is not something to improvise with.
Some electrical issues call for a licensed electrician instead of a quick fix at the chair:
- Outlets that feel loose or warm. That points to a house-level issue, not a chair issue.
- Cord routes that require floor modifications. The chair should fit the room as it is, without creating a new trip hazard.
- Repeated loss of power after correct reconnects. That can signal a wiring fault rather than a missed plug.
- Need for new electrical work. If there is no safe outlet location, the chair should wait until the room is ready.
For homeowners comparing powered seating types, what a power recliner is gives a useful baseline for how these chairs function once they are plugged in. The takeaway is simple. Electrical hookup is where a lift chair stops being just furniture and becomes dependable equipment, and that step is where professional delivery often earns its keep.
Safety Checks and Functional Testing
The safest chair is the one that gets tested before anyone uses it alone. A delivery professional will check the frame, the level, the travel path, and the control response before the user sits down for a real trial. That sequence catches problems when they're still easy to correct.
A school district lift specification requires installation under printed manufacturer instructions and governing regulations, with electrical work aligned to the National Electric Code and the lift kept level and plumb with secure inspection approval source%20Shaftway%20Vertical%20Wheelchair%20Lifts.doc). Residential lift-chair installs are simpler than building-mounted lifts, but the standard is still useful, the chair should sit straight, move cleanly, and pass inspection in its own context.
The first test is static. The chair should look even from front to back, with no visible twist in the base. The second is operational. Run the lift and lower cycle, then the recline cycle, and make sure nothing hesitates, scrapes, or stalls halfway. The third is user-centered. A supervised trial lets the installer adjust hand-control position, footrest behavior, or lumbar feel before routine use begins.
A practical checklist helps keep the sequence tight:
- Check level and plumb. A crooked base creates stress and odd motion.
- Confirm any anti-tip or stabilizing parts are engaged. Safety pieces only help if they're in place.
- Run the full cycle more than once. A one-time success doesn't prove consistent operation.
- Test stop behavior. The chair should respond immediately and predictably.
- Watch the user transfer. Comfort matters, but safe standing matters more.
A medical-necessity guideline for power seat lift chairs can require that the member cannot safely transition from sitting to standing even with aids or caregiver help, and for chronic venous disease it can require lower-extremity elevation to heart level for 30 minutes, three to four times per day when other methods aren't possible source. That level of specificity is a good reminder that the user test should match the actual use case, not just a quick demonstration.
For more product context on models and comfort styles, this guide to best-rated power lift recliners can help frame expectations. Still, the chair's reputation doesn't matter if the setup hasn't been verified in the room where it'll be used every day.
Troubleshooting Common Installation Problems
A lift chair can look fine during setup and still fail once real weight, real movement, and real use begin. That is why troubleshooting starts with the room, the wiring, and the assembly order, not just the buttons on the hand control. In the field, the problems that show up most often are simple misses that hide until the chair is under load, such as a connector left loose, a cord caught behind the frame, or a part that never seated fully.
Start with the basic checks. Confirm the outlet has power, make sure the cord is not pinched, and trace every harness behind the chair to see that it is fully connected. Then check the feature wiring one by one, because lumbar, headrest, heat, and massage systems can fail independently. When one function works and another does not, the whole chair is not usually broken, one connection is missing or one lead is not seated.
A chair that powers some functions and not others usually has a connection problem, not a broken motor.
If the chair binds, drags, or sounds rough, look at the frame alignment and the points where the base meets the floor. A base that was not seated evenly can wobble and put stress on the motion path, especially as the chair rises or lowers under load. Small fit problems at the base often show up later as noise, uneven travel, or a feeling that the chair is fighting itself.
I have seen plenty of chairs blamed on a dead motor when the actual issue was a connector hidden inside the shell. Guided assembly footage shows how easy those plugs are to miss because they sit tucked away behind the upholstery source. In plain terms, a feature can look dead from the outside while the fault is still inside the chair body.
A good order for troubleshooting keeps the work focused:
- Recheck all visible connectors. Missed plugs are usually the fastest fix.
- Reset power at the outlet. A brief interruption can clear a false fault.
- Inspect for obstructions. Carpet edges, décor, or a wall placed too close behind the chair can stop travel.
- Listen for strain. Grinding, stalling, or uneven movement needs attention before more use.
- Stop if the chair behaves unpredictably. Erratic motion is a safety issue, not a situation to test again.
The wider market does not remove the need for careful setup at home. Lift chairs are sold through established retail channels, but that still leaves room for installation mistakes when a chair is unpacked, assembled, and plugged in by the buyer source. A calm, methodical check usually finds the problem faster than guessing. That approach protects the chair, saves time, and keeps a small missed step from turning into a service call.
Maintenance Tips and When to Choose Professional Installation
A lift chair stays reliable when someone treats it like a working mechanism, not just a piece of upholstery. The routine stays simple, but it works best when it is done consistently. Vacuum dust from around the base, inspect cords for wear, keep the space behind the chair clear, and check that the backup battery still responds during routine tests. If the chair has moving joints or pivot points, keep them clean and watch for unusual resistance instead of waiting until they start to squeak.
The harder question for many Norwich and Eastern CT households is whether DIY setup is the right call. Homes with narrow stairways, tight turns, or limited carrying space make professional delivery the safer choice because the risk is not only assembly, it is getting the chair through the house without damaging walls, trim, or the chair itself. The same is true when the chair is being purchased because someone depends on it for standing help or daily support.
Professional installation also pays off when warranty protection depends on authorized setup or when the buyer wants the delivery team to verify controls, battery backup, and user operation in one visit. That is practical, not extravagant, for a powered chair. It reduces callbacks and gives the household a chair that is ready for regular use on day one.
Shoppers who are weighing comfort, value, and setup support should see the chair in person, compare control layouts, and decide whether the room calls for delivery help or a lighter DIY approach. A visit to the Norwich showroom can clear that up quickly, and the online Style Quiz can narrow choices before anyone commits. For value-focused savings, the Clearance section is worth checking as well.
A CTA for Gorins Furniture & Mattress. Visit the Norwich showroom, take the online Style Quiz, or browse the Clearance section to find the right lift chair setup for your home.